This post may contain affiliate links, or we may earn money from the companies mentioned in this post. For more information on this, please visit our legal page.
I love the Happy Heart Made blog and so I was eager for Michelle to share one of her posts,
Her crafts are really inventive and you can see that she has a real love for art!! if you are looking for some inspiration you should check out her out at Happy Heart Made.
The post she has shared is about the process (and the wonderful creations) she has gone through teaching art to children and I love it (and am a little jealous because these pictures are great and I can’t paint that well!)
So without furthder ado, here is Michelle on the finger painting flower love!!
*Guest Post*
Finger Painting Flower Love!
When I started teaching 1st – 3rd grade art classes, I wanted to have children make things that would be kept and not thrown away. At first, it would take nine weeks to complete one project. Although, we made very involved art pieces (i.e. glass mosaics), parents wanted to have several works from their children. This did over whelm me at first, but I soon realized kids are able to create almost anything if it is broken down into steps.

With a lot prayer and gleaning from the input the children offered, teaching has become such a joy. I love investing in the lives of these precious little ones and learning from their honest responses. Many times, when I was not sure how to break something down to their level, a child would comment with the most helpful explanation. I realized, if I allowed them to be involved in the teaching process, I would be able to know they are learning something and become a better teacher in the process.
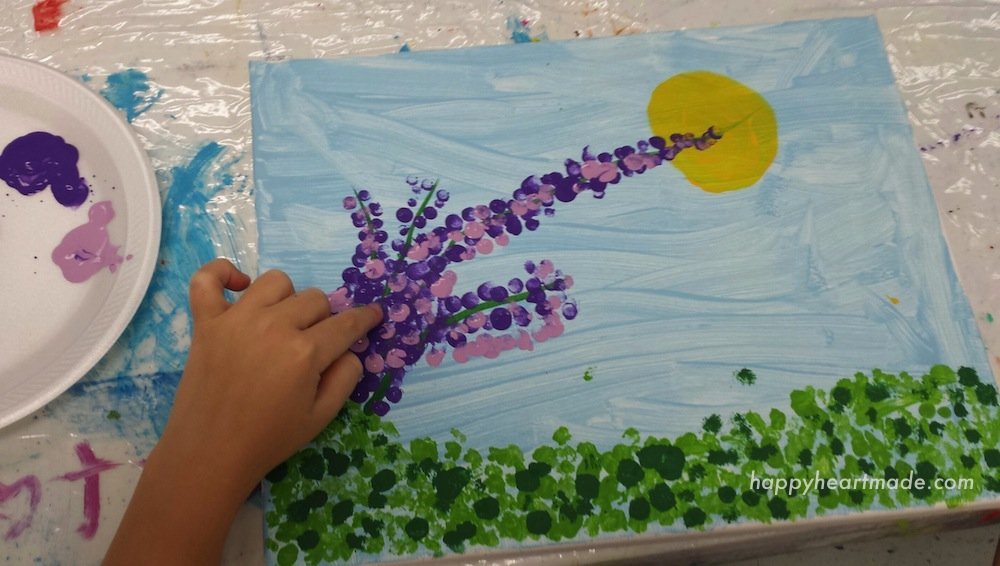
We work on 3 to 4 art designs in the 9-week time frame. One of my favorite projects the students worked on is a painting (Hedgerows (Kaleidoscopic) II) inspired by artist, Yvonne Coomber,

For this project we incorporated the element of shape called the “dot”. I gave each student an 11×14 canvas. They were able to decide on a background color of yellow or blue to represent the sky. We discussed (the terms) background and foreground in a painting. This gave the students an opportunity to share what was the furthest element (background) in the painting that we would need to paint first and what we would paint last (foreground – is the closest).

With each new item (sun, grass, stems, petals…) added to the painting, I demonstrate and explain what I am doing. For this project, the students were given the option to use a small (round) stencil brush or “one” finger to paint their flowers (emphasis on “ONE” or else the kids would have both hands covered in paint and paint on everything). They were provided hand wipes to clean their fingers off between colors.
Most students wanted to use their finger so I am glad I adventured down that path…but with clear instructions!

As you can see their work is so happy and just beautiful! Made to brighten any wall with a little cheer! Plus, the kids had fun learning and creating these masterpieces with just a touch of a finger!
Michelle ♥
Where You Can Find More of Michelle:
Happy Heart Made | Instagram | Twitter | Pinterest | Facebook | Linkedin
What do you think of how the pictures turned out? Have you tried teaching your kids something similar?
18 comments on “Finger Painting Flower Love”
Comments are closed.
wow what a beautiful piece of art.. when i was a preschool teacher i use to love doing finger painting with the class.. they are just fab to have as keepsakes to
Oh how gorgeous this painting is! I love finger painting and so does the children!
Absolutely beautiful!! It reminds me of a fine art technique I learnt at uni called Pointillism — which is where dots of colour are applied to form an image. This is SO like it!! What a lovely project 🙂
These are amazing, what a little artist you have right here x
Oh my gosh these are beautiful! I can’t wait to do more crafty things with Toby! Going to pin this xx
what a lovely idea and one that will look fab. You can’t go far wrong with finger print painting.
That looks really effective, I normally shy away from fingerpainting because of the mess, but I know theyd love it
Aww wow this looks beautiful, never thought of using finger painting to do something like this before. Great pictures x
This is such a beautiful piece of art and so incredible that it’s by a little one. I like your style of teaching and breaking it down so the creation process is possible for everyone. x
What a great idea and the results are beautiful!
Wow. I love the end result. I will try it with my Toddler though I doubt it will look as good. Still, it will be fun.
How lovely – I like the idea of enabling the kids to make a proper picture that has taken time, thought and effort but that has also been a joy for them to do. That’s the reality of creative processes after all. And it will be nice for the parents to have a proper picture brought home for a change, something they can keep and be proud of
I am definitely going to try this with Pickle – although I suspect the outcome won’t look anything like this! What gorgeous paintings, I love them. Kaz x
What a lovely technique for children to explore. It’s a gorgeous picture and I think I might have some little girls that would enjoy using it too
My toddler loves to finger paint. Although it looks nothing like this, she enjoys it. This looks really nice x
My daughter loves fingerprinting! These are beautiful by the way 🙂 It certainly does leave a smile on my face 🙂 x
What a pretty image. Finger printing can make some amazing art work not just with kids.
This is such a lovely idea and really simple even for little ones. It’s a good idea getting them involved in the teaching process too.